Thursday, May 12, 2011

Strawberry Limeade

Spring is here and so are all the delicious strawberries!!!  This drink makes me feel like sitting on my porch as the sun is setting, watching my kids ride their bikes down the street and talking to neighbors who are walking by....
I'm so excited that summer is just around the corner!

There are only a few ingredients in this beautiful recipe, most of which are probably already in your kitchen.
Ingredients:
1 can limeade
3/4 lb Strawberries
1/2 c sugar
3 C water
approx 2 c. ice


In a blender put in all ingredients, placing ice last.  Blend away.  If your blender is kindof small, you may need to pour a little bit out into a pitcher in order to finish adding whatever wouldn't fit.  Once it's all combined into your serving pitcher it won't matter.  You could also add more sugar if you want it sweeter, but I like the tart blend.   Obviously this drink separates quickly, so stir often before pouring.  Cheers!!

Linking up to

Thursday, May 5, 2011

Fruit Bouquet {Mother's Day or Teacher Appreciation}

My sister broke her ankle a couple of years ago.  It was sad, not only for obvious reasons, but because she also missed a flight with us to go to Disneyland!  Luckily, she was able to catch up with us a couple of days later in the 'Land and we all benefited from her "wheelchair pass" which allowed us to skip to the front of the line!!  Where am I going with all of this? Well, we benefited from her broken ankle at Disneyland, and we also benefited from the fact that her boss sent her an amazing Fruit Bouquet!  (I try to look at the bright side of things :) which was easy this time since it wasn't my foot!) It was a huge and delicious bouquet, and I had never seen one in real life up to that point.  (You'd think I discovered diamonds or something from how excited I got).   I had fun picking it apart and seeing how easy it really was to put together.  Since then, I have made a few for friends and teachers, and it is a really fun gift.  Mine are smaller than the basket my sister got, but the thought is always appreciated! 

PS. If you take this to give to your friend at her birthday party, don't just set it down in the middle of the gift table. Make sure you hand it to her directly. It *may* start to disappear before she sees it. Trust me on this one.


Items Need: 
*Clean container (I usually find flower pots, pails, tins of various sizes at the dollar or craft store marked down)
*Iceberg lettuce, cut to fit tightly down in the pot OR Floral    foam, cut to size
*Kale or leafy green lettuce
*Skewers
*Fruit (mostly strawberries, grapes, cantaloupe, pineapple,    kiwi, watermelon)  Not any fruit that gets brown
*Shaped cookie cutter (preferably metal) stars, hearts, flowers

 Place the head of iceberg lettuce or foam into the container.  It should be a tight fit.  Cover with the pretty dark green lettuce so no foam is showing through.  Wash all the fruit, and then start skewering!  I like levels, so cut/break skewers accordingly.  

To cut the pineapple, I slice the peel off like this:


Then lay it down and cut about a 1/4"- 1/2"  circle off like this
(do it thick enough, especially with watermelon so it is strong enough when you put a skewer through)

Use a cookie cutter  to cut out your shape.  You may have to use a knife to make the edges smooth if you use a weak cookie cutter.  The skewer goes up through the core of the pineapple to make it sturdy. 

For the cantaloupe center on a pineapple flower, use a melon baller or small cookie scoop to get a ball, then cut that ball in half and use a toothpick to connect it to the pineapple.  Attach a half of a grape the same way.

Variations:  (sorry no pictures)
*Chocolate dipped strawberries are a welcome addition. (white or brown)
*Cream filled Strawberries: Cut an X out of the bottom of the strawberries (the bottom will actually be facing up--make sense?)  Just pipe a little bit of cream cheese frosting into the X for a yummy filling
*Marshmallows alternated with grapes for the tall pieces are pretty too!
Don't be jealous of my coffee table in this picture....

I want to see pictures if anyone makes one!!

Catch a Glimpse Button

Tuesday, May 3, 2011

Cinco de Mayo Sombrero Cookies

 I had to take dinner to a friend last year, and it happened to fall on Cinco de Mayo! I wanted to have a fun little treat for the kids, and remembered this cute idea I had seen in Family Fun.

This was before I blogged, so sorry there are no step-by-step photos, only this one!! It's really easy though...
Olé!

Ingredients:
round cookies (I just bought some cheap ones at Walmart--I wanted cookies that looked brownish)
White frosting
colorful, round sprinkles
Kraft Caramels

Unwrap a few caramels and heat in microwave for 12 seconds.  Shape half or whole caramel (depending how big you want it) like the top of the hat.  Spread frosting around edges of caramel and cookie, sprinkle on the colors or roll the edges in some sprinkles.

Also, check out this Queso Dip for your other Cinco de Mayo needs.


Linking up to:


Tip Junkie handmade projectsDIY under $5Tempt my Tummy Tuesdays


Catch a Glimpse Button

Monday, May 2, 2011

Thing 1 & Thing 2 Dr. Seuss Twin Baby Shower

My friend Sabrina recently had twin baby girls. I know. Wow!

Wow in an exciting way and Wow, that's a lot to handle!!

Our friend Tina had a shower for her, and of course the theme had to be Thing 1 & Thing 2!  It was SO SO SO adorable.  And loud. You know how at baby showers everyone squeals and claps when a really cute outfit is opened?  Well, imagine double the squealing.  If one thing is adorable, then two identical outfits are totally precious.  Seriously. So. Cute.

It all started with these adorable invites.  I mean, how could I not smile after reading this?  The text goes as follows:

Having a party for one
Is a fun thing to do
But just think what fun we'd have
When there's a party for two!

The girl babies to be
Are fast on their way!
Thing 1 & Thing 2
Will be here to stay!

Let's shower Sabrina
With gifts galore!
To help welcome the babies
We all will adore!

You would not, could not
Want to miss
A celebration such as this!

February is the month,
The 5th is the day,
On Saturday from 6 until 8
RSVP now, please don't delay!


Tina had the place decked out so adorable, here are a few of her pictures. 

I love this Dr. Seuss banner. It is just made from a "Cat in the Hat" book purchased at the DI for a dollar.  Did she feel bad cutting up a book? Yes. But it was in the name of party cuteness and that was certainly achieved.  Tina just cut the pages into triangles then threaded some yarn through punched out holes.   

I loved these tissue paper pom poms.  They were pretty easy to make and added so much flair hanging from the ceiling. 
There were not one, but two diaper cakes adorning the table.  I've never seen diapers looking so cute! I wouldn't ever want to use them. (until 2 a.m. hits one morning and I realize I'm completely out of my diaper stock....)

The food table.  Of course, the food was delicious and very Suess stylish in the colors of Red, White, and Teal.


Candy jars filled with blue gumballs, marshmallows, and red hots added a touch of whimsy.


 Who doesn't love pretzel rods dipped in chocolate..... or red velvet cupcakes with cream cheese frosting?
*sigh* I wish I had some right now in fact.
And now, as if Tina didn't totally already outdo herself with the food and decorations, here are the adorable onsies and dolls she made.
Way to go Tina!! This shower was so much fun and it was such a nice party for you to throw! Congrats to my friend Sabrina for the arrival of her beautiful baby girls.

Thursday, April 28, 2011

Kid Food Craft--edible Spring Bird nests

Spring has come to some parts of the country, I assume!! In between the snow storms here in Utah I can hear a few birds outside, singing their lovely songs.  It was my turn to teach a preschool group this week and I decided this would be a fun and easy way to entertain 3 year olds while talking about spring!!

 Only a few ingredients are needed for this food craft, along with a LOT of wipes or towels for messy fingers!

Ingredients: 10 oz Chow Mein noodles (about 6 cups)
1 C. Chocolate Chips
1 C. Butterscotch Chips
"Bird eggs"  any kind of candy shaped like an egg
Wax paper

Place chips in microwave safe bowl.  Heat on high about 30 seconds, then stir. Heat in 20 second increments one or two more times if necessary, stirring in between.  Pour in noodles and mix thoroughly.  Using hands, create little nests on wax paper.  Place eggs on top and put in the refrigerator to harden.
Made about 8-10 good sized nests

*I used different measuring cups/bowls so all my *helpers* could have a turn to pour in something.  They all got a chance to stir and form their own nests.  It was a fun activity!*


Tuesday, April 26, 2011

Sweet Chex Mix

Do you have any candy left from the Easter Bunny?  Wondering what to do with all those M&M's? You could just eat them of course, OR, you could add more sugar and butter and yumminess to them to make them even better!!  This was always my family's Sunday night treat growing up, when we would all gather together to watch America's Funniest Home Videos.  You know, family bonding whilst laughing at people falling down.  Classic.

This Chex mix is always a hit, be it with your own family or at a party.  I've never seen any left over!!

Chex Mix:
about 9 C. cereal (I use Chex and Golden Grahams)
1 C.  Coconut
1 C.  Slivered Almonds
M&M's  (to taste)
1 C.  Karo Syrup
1 C.  Sugar
2/3 C. Butter

In a large bowl, combine cereal, coconut, almonds, and M&M's. 
In a saucepan, bring Karo syrup, sugar, and butter to a boil for 2 minutes.  Pour over cereal mixture and stir well.  Spread out on a cookie sheet covered in wax paper and allow to cool.  Eat.  Then eat some more because you can't stop!                                                                                                                                                                                                                                                       


*food in this picture provided by my friend Tina.  Thanks for the deliciousness!!*

Thursday, April 21, 2011

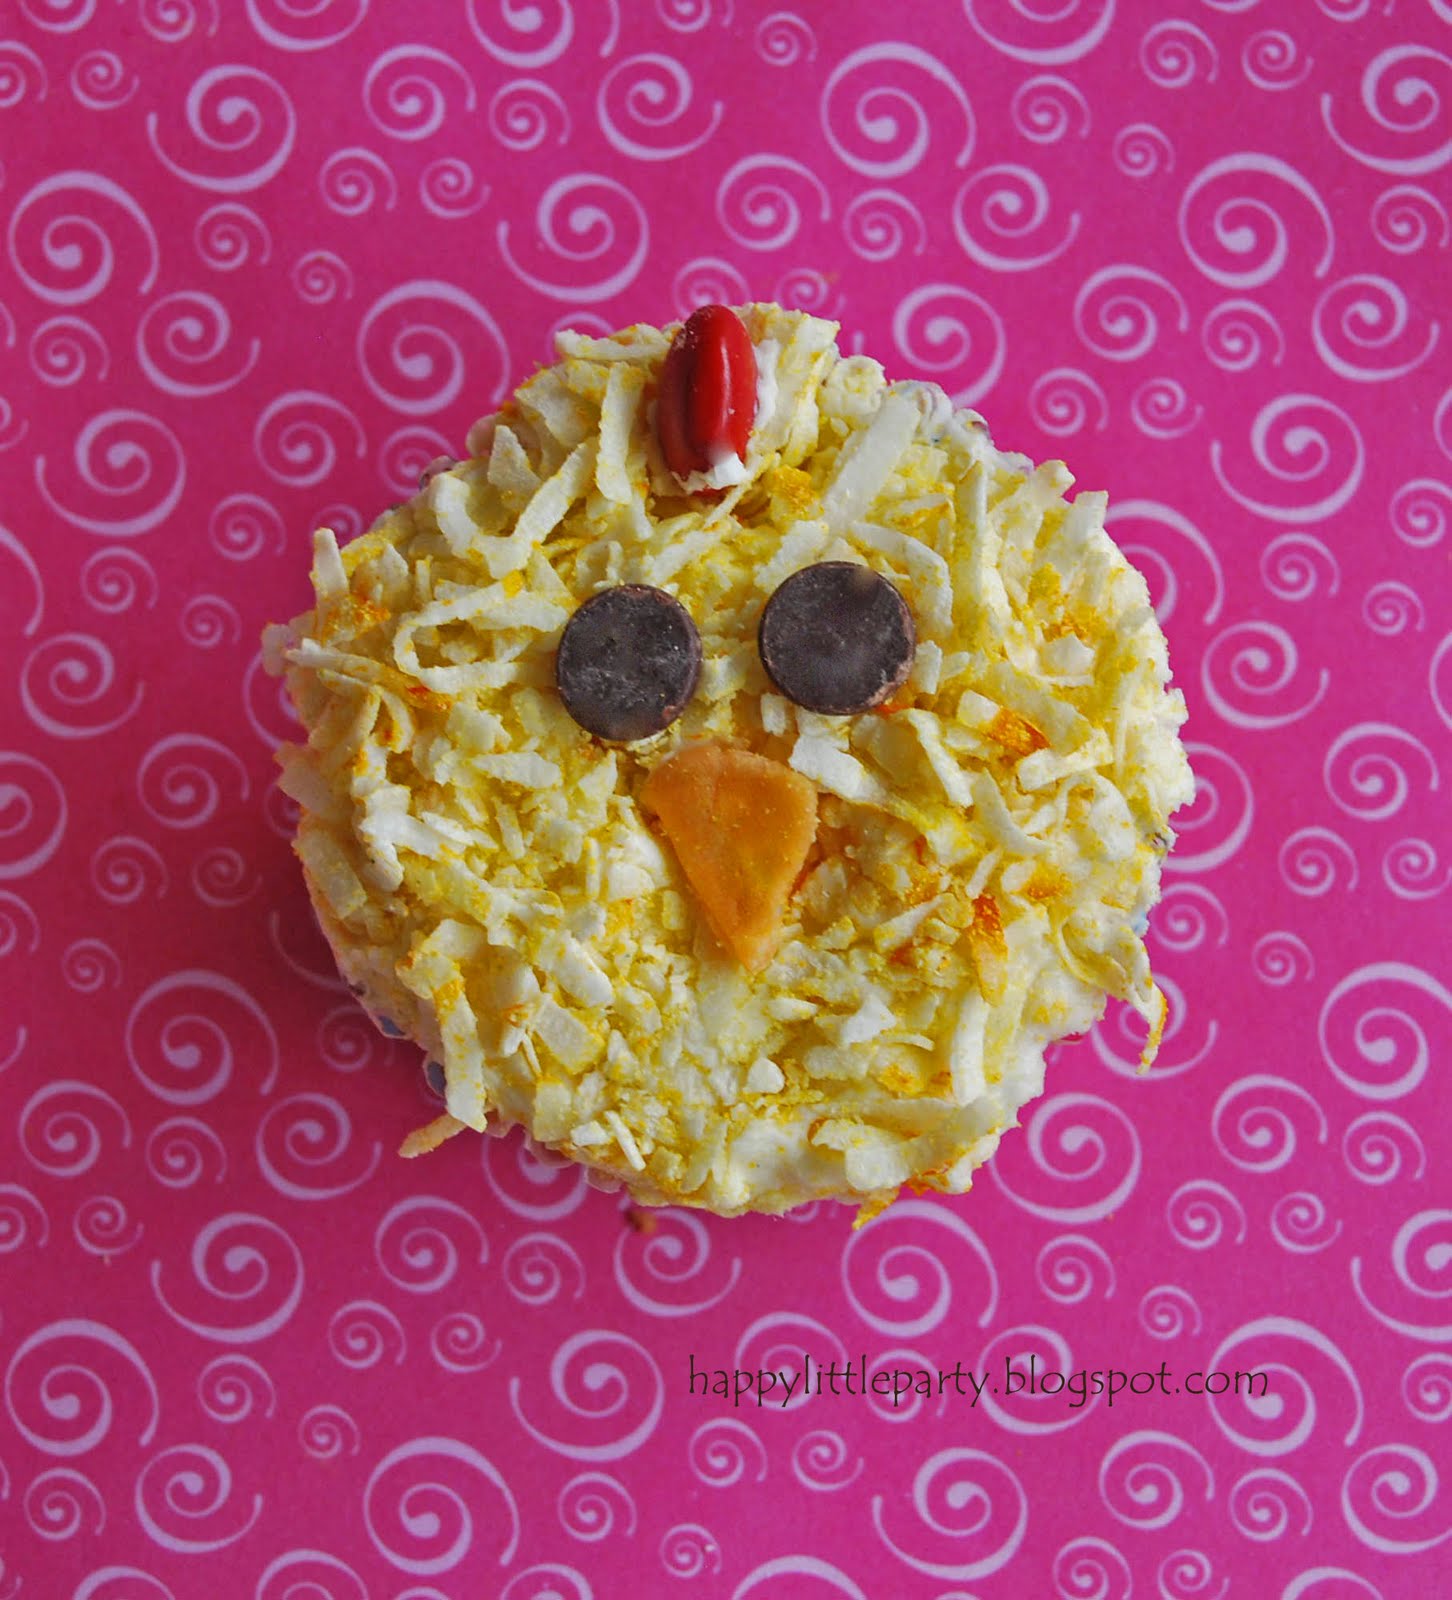
Easter Spring Cupcakes

Easter weekend is practically here!! Think these guys will be a welcome addition to our family dinner!? I love to decorate with candy, and these do not disappoint.  They are easy to throw together using a few ingredients. 


Bunny cupcake:
White frosted cupcake
White coconut
1 large marshmallow cut in half (for ears)
1 small marshmallow cut in half (for the face fluff under the nose)
2 chocolate chips (for eyes)
pink Starburst or heart shaped runt (can I use that in the singular sense?)
I used a toothpick broken in half to attach each ear.  I used chocolate frosting in a baggie to pipe the whiskers.


Easter Chick cupcake:
White frosted cupcake
Coconut colored yellow
2 chocolate chips (eyes)
Orange Starburst molded like a beak
red m&m for top thingy
         (I know that baby chicks, which are normally associated with Easter don't have this comb yet, but I   
          wanted to add it anyway. *Shrug*)


 Lamb cupcake:
Chocolate covered cupcake
Mini marshmallow cut in half or thirds (my marshmallows happened to be stale, which may have made it easier to cut!! Less sticky anyway...)
1 large marshmallow cut in half, then that circle cut diagonally (clear as mud?) for ears

 **this is the cupcake I made three times and am still not sure I like!! It bears a resemblance to the cartoon character "Shawn the Sheep" more than a cute Easter lamb.  But using white frosting underneath was really light and white.  I'm not sure.  Let me know if you make anything that works! ***


Bluebird Cupcake: 
White frosted cupcake
Blue colored coconut
2 chocolate chips (eyes)
Starburst shaped into a beak (put in microwave for 10 seconds if it is too hard to shape)


Have a very Happy Easter!!


linking up here:


Tip Junkie handmade projects


Related Posts Plugin for WordPress, Blogger...